配环境:基于Docker的实验环境搭建
官网文档十分详细:
在本系列实验中,每个实验只关注操作系统的某个部分,因此不同实验用git管理:
 1
 2
 3
 4
 5
 6
 7
 8
 9
10
11
12
13
14
|
root@55724e7ba091:/xv6-labs-2023# git branch -r
  origin/HEAD -> origin/util
  origin/cow
  origin/debugging-demo
  origin/fs
  origin/lock
  origin/mmap
  origin/net
  origin/pgtbl
  origin/riscv
  origin/syscall
  origin/thread
  origin/traps
  origin/util
|
于是要切换到某个实验只需git switch -c <branch>切换分支即可。当然要注意保存当前branch的结果。
最后给出我的dockerfile:
1
2
3
4
5
6
|
FROM ubuntu:20.04
ENV DEBIAN_FRONTEND=noninteractive
RUN sed -i 's/archive.ubuntu.com/mirrors.ustc.edu.cn/g' /etc/apt/sources.list
RUN apt-get update
RUN apt-get install -y git build-essential gdb-multiarch qemu-system-misc gcc-riscv64-linux-gnu binutils-riscv64-linux-gnu
RUN git clone git://g.csail.mit.edu/xv6-labs-2023 && cd xv6-labs-2023
|
XV6,启动!
QEMU(Quick Emulator)是一个开源的虚拟化和模拟器工具,它可以模拟多个硬件架构,包括x86、ARM、MIPS等。QEMU支持在主机系统上模拟虚拟机,并提供了一种灵活的方式来进行虚拟化开发和测试。——from GPT
环境配好后,运行make qemu即可进入xv6系统。
 1
 2
 3
 4
 5
 6
 7
 8
 9
10
11
12
13
14
15
16
17
18
19
20
21
22
23
24
25
26
27
|
xv6 kernel is booting

hart 1 starting
hart 2 starting
init: starting sh
$ ls
.              1 1 1024
..             1 1 1024
README         2 2 2305
xargstest.sh   2 3 93
cat            2 4 32312
echo           2 5 31184
forktest       2 6 15296
grep           2 7 35664
init           2 8 31984
kill           2 9 31192
ln             2 10 31104
ls             2 11 34224
mkdir          2 12 31232
rm             2 13 31208
sh             2 14 53464
stressfs       2 15 32080
usertests      2 16 180664
grind          2 17 47288
wc             2 18 33312
zombie         2 19 30760
console        3 20 0
|
可以发现这里的可执行文对应着项目文件夹里user目录下的源代码。也就是说目前我们处于用户态。But how it works?
由于执行的是make指令,当然要去阅读Makefile了:
1
2
3
4
5
6
7
|
QEMUOPTS = -machine virt -bios none -kernel $K/kernel -m 128M -smp $(CPUS) -nographic
QEMUOPTS += -global virtio-mmio.force-legacy=false
QEMUOPTS += -drive file=fs.img,if=none,format=raw,id=x0
QEMUOPTS += -device virtio-blk-device,drive=x0,bus=virtio-mmio-bus.0

qemu: $K/kernel fs.img
    $(QEMU) $(QEMUOPTS)
|
这里真正启动了qemu程序,系统的内核、文件系统都在QEMUOPTS中指定。而我们的用户态程序都位于fs.img内:
 1
 2
 3
 4
 5
 6
 7
 8
 9
10
11
12
13
14
15
16
17
18
19
20
|
UPROGS=\
    $U/_cat\
    $U/_echo\
    $U/_forktest\
    $U/_grep\
    $U/_init\
    $U/_kill\
    $U/_ln\
    $U/_ls\
    $U/_mkdir\
    $U/_rm\
    $U/_sh\
    $U/_stressfs\
    $U/_usertests\
    $U/_grind\
    $U/_wc\
    $U/_zombie\

fs.img: mkfs/mkfs README $(UEXTRA) $(UPROGS)
    mkfs/mkfs fs.img README $(UEXTRA) $(UPROGS)
|
这里让mkfs程序将文件系统构建成img格式的镜像。用户态程序都包含在UPROGS变量中。那么这些下划线开头的可执行文件又是谁编译的呢:
1
2
3
4
|
_%: %.o $(ULIB)
    $(LD) $(LDFLAGS) -T $U/user.ld -o $@ $^
    $(OBJDUMP) -S $@ > $*.asm
    $(OBJDUMP) -t $@ | sed '1,/SYMBOL TABLE/d; s/ .* / /; /^$$/d' > $*.sym
|
这里涉及到Makefile的一个通用技巧:-o $@ $^中的$@表示当前目标也,即_%,$^表示当前的依赖,即%.o $(ULIB)。于是我们知道这一步执行的是链接操作,那么编译又是谁干的呢?
伟大的gpt老师告诉我们,makefile中存在这样的隐含规则,他会自动为.o文件寻找.c来编译:
1
2
|
%.o: %.c
    $(CC) -c $(CFLAGS) $< -o $@
|
终于捋顺了。虽然我们对操作系统内核的认识还很黑箱,但这些说的道理足以完成第一个实验了。
Lab1 Utils
第一个实验要求完成编写几个用户态函数,首先要明确一点,我们是在一个全新的操作系统,已经没有libc可用了!我们能够使用的只有XV6提供的系统调用,其定义都在user/user.h中:
 1
 2
 3
 4
 5
 6
 7
 8
 9
10
11
12
13
14
15
16
17
18
19
20
21
22
23
24
25
26
27
28
29
30
31
32
33
34
35
36
37
38
39
40
41
|
struct stat;

// system calls
int fork(void);
int exit(int) __attribute__((noreturn));
int wait(int*);
int pipe(int*);
int write(int, const void*, int);
int read(int, void*, int);
int close(int);
int kill(int);
int exec(const char*, char**);
int open(const char*, int);
int mknod(const char*, short, short);
int unlink(const char*);
int fstat(int fd, struct stat*);
int link(const char*, const char*);
int mkdir(const char*);
int chdir(const char*);
int dup(int);
int getpid(void);
char* sbrk(int);
int sleep(int);
int uptime(void);

// ulib.c
int stat(const char*, struct stat*);
char* strcpy(char*, const char*);
void *memmove(void*, const void*, int);
char* strchr(const char*, char c);
int strcmp(const char*, const char*);
void fprintf(int, const char*, ...);
void printf(const char*, ...);
char* gets(char*, int max);
uint strlen(const char*);
void* memset(void*, int, uint);
void* malloc(uint);
void free(void*);
int atoi(const char*);
int memcmp(const void *, const void *, uint);
void *memcpy(void *, const void *, uint);
|
Lab1-1: sleep
sleep i命令要求进程暂停一定时间。输入一个整数,表示时间量,其单位则是系统定义的tick。
天下代码一大抄,我们观察到kill指令的输入和sleep差不多,都是整数,只不过kill可以接受多个输入。而kill和sleep都有系统调用的定义,因此直接抄过来:
 1
 2
 3
 4
 5
 6
 7
 8
 9
10
11
|
#include "kernel/types.h"
#include "user/user.h"

int main(int argc, char **argv){
  if(argc != 2){
    fprintf(2, "usage: sleep tick\n");
    exit(1);
  }
  int ret = sleep(atoi(argv[1]));
  exit(ret);
}
|
完成代码编写后按规则讲sleep加入UPROGS参数,最后执行评分脚本:
1
2
3
4
5
6
|
root@55724e7ba091:/xv6-labs-2023# ./grade-lab-util sleep
make: 'kernel/kernel' is up to date.
== Test sleep, no arguments == sleep, no arguments: OK (1.4s)
== Test sleep, returns == sleep, returns: OK (0.9s)
== Test sleep, makes syscall == sleep, makes syscall: OK (1.0s)
    (Old xv6.out.sleep failure log removed)
|
实验文档中的最后给出了一些隐藏关,第一关要求实现uptime,也是掉接口,比sleep更简单:
1
2
3
4
5
6
7
|
#include "kernel/types.h"
#include "user/user.h"

int main(int argc, char **argv){
  fprintf(2, "uptime: %d\n", uptime());
  exit(0);
}
|
Lab1-2: pingpong
pingpong命令将创建两个进程,并通过管道在两个进程间通信一个字节。官方文档对这个命令的实现描述的很清楚了:
- Use
pipe to create a pipe.
- Use
fork to create a child.
- Use
read to read from a pipe, and write to write to a pipe.
- Use
getpid to find the process ID of the calling process.
需要注意int pipe(int fd[2])仅支持单向通信,输入是两个fd分别表示读/写。因此读和写需要两个pipe。pipe返回fd之后,再执行fork即可让父子两个进程共享相同的pipe。
 1
 2
 3
 4
 5
 6
 7
 8
 9
10
11
12
13
14
15
16
17
18
19
20
21
22
23
24
|
#include "kernel/types.h"
#include "user/user.h"

int main(int argc, char *argv[]) {
  int pid, p1[2], p2[2];
  char buf[] = {'?'};
  pipe(p1);
  pipe(p2);

  int ret = fork();
  if (ret == 0) { // 返回0表示子进程
    pid = getpid();
    read(p1[0], buf, 1);
    printf("%d: received ping\n", pid);
    write(p2[1], buf, 1);
    exit(0);
  } else {
    pid = getpid();
    write(p1[1], buf, 1);
    read(p2[0], buf, 1);
    printf("%d: received pong\n", pid);
    exit(0);
  }
}
|
Lab1-3: primes
在上一个程序的基础上,primes希望使用多进程机制实现素数筛。具体流程为:
- 每个进程通过管道从其左邻居读取数据,并通过另一个管道写入其右邻居。
- 每个进程代表一个素数,并判断传来的数是否是自己的倍数。当遇到新的素数时,创建新的子进程。
因此,针对第一步,每个进程都保持两个管道,一个临时变量,不断进行”读→判断→写“的循环。
1
2
3
4
5
6
7
8
9
|
int me = 0, tmp = 0;
int read_pipe[2], write_pipe[2];
while (1) {
    read(read_pipe[0], &tmp, 4); // 从左边读
    if (tmp % me != 0) {
        try_fork();
        write(write_pipe[1], &tmp, 4); // 往右边写
    }
}
|
针对第二步,当且仅当不被任何一个进程的数整除的时候进行fork。也就是当输入的数流动到最后/最新的进程的时候。因此需要一个状态变量判断自己是否是最新进程。
 1
 2
 3
 4
 5
 6
 7
 8
 9
10
11
12
13
14
15
16
17
|
int me = 0, tmp = 0, forked=0;
int read_pipe[2], write_pipe[2];
while (1) {
    read(read_pipe[0], &tmp, 4);
    if (tmp % me != 0) {
        if (!forked) {
            pipe(write_pipe); // 初始化管道
            forked = 1;
            if (fork() == 0) { // 子进程重新进行初始化
                read_pipe[0] = write_pipe[0]; // 读写管道交换
                forked = 0;
                me = 0;
             }
        }
        write(write_pipe[1], &tmp, 4);
    }
}
|
最后,主函数应该向管道中写入35个数,并且完成关闭多余的fd,终止条件等操作:
 1
 2
 3
 4
 5
 6
 7
 8
 9
10
11
12
13
14
15
16
17
18
19
20
21
22
23
24
25
26
27
28
29
30
31
32
33
34
35
36
37
38
39
40
41
|
#include "kernel/types.h"
#include "user/user.h"

int main(int argc, char *argv[]) {
    int me = 0, tmp = 0, forked=0;
    int read_pipe[2], write_pipe[2];
    pipe(read_pipe);
    for (int i = 2; i <= 35; i++)
        write(read_pipe[1], &i, 4); // 初始先往read_pipe里写满
    close(read_pipe[1]);
    while (1) {
        if(read(read_pipe[0], &tmp, 4)){
            if (me == 0) {
                me = tmp;
                printf("prime %d\n", me);
            }
            if (tmp % me != 0) {
                if (!forked) {
                    pipe(write_pipe);
                    forked = 1;
                    if (fork() == 0) {
                        close(write_pipe[1]); // 子进程的write_pipe尚未开发
                        close(read_pipe[0]);
                        read_pipe[0] = write_pipe[0];
                        forked = 0;
                        me = 0;
                    } else close(write_pipe[0]);
                }
                if (forked) write(write_pipe[1], &tmp, 4);
            }
        } else { // 所有数都读完了,等待子进程退出
            close(read_pipe[0]);
            if (forked) {
                close(write_pipe[1]);
                int child_pid;
                wait(&child_pid);
            }
            exit(0);
        }
    }
}
|
Lab1-4: find
find指令要求在特定名称的目录树中查找文件。程序大部分可以借鉴ls的实现,只需要在输出的时候执行字符串比较,并且实现递归查找。不过首先要了解文件系统的接口:
 1
 2
 3
 4
 5
 6
 7
 8
 9
10
11
12
13
|
// kernel/fs.h
struct dirent { // Directory is a file containing a sequence of dirent structures.
  ushort inum;
  char name[DIRSIZ];
};
// kernel/stat.h
struct stat { // 文件状态结构体
  int dev;     // File system's disk device
  uint ino;    // Inode number
  short type;  // Type of file
  short nlink; // Number of links to file
  uint64 size; // Size of file in bytes
};
|
于是遍历目录的操作通常为:
1
2
3
4
5
6
7
|
fd = open(path, O_RDONLY)) < 0);
fstat(fd, &st);
switch(st.type){
  case T_DIVICE: ...
  case T_FILE: ...
  case T_DIR: ...
}
|
于是在T_DIR分支内实现递归,在T_FILE分支内查找字符串即可:
 1
 2
 3
 4
 5
 6
 7
 8
 9
10
11
12
13
14
15
16
17
18
19
20
21
22
|
switch(st.type){
  case T_FILE:
    if(match(path, pattern)>=0)
        printf("%s\n", path);
    break;
  case T_DIR:
    strcpy(buf, path);
    p = buf+strlen(buf);
    *p++ = '/';
    while(read(fd, &de, sizeof(de)) == sizeof(de)){
      if (de.inum == 0 || trcmp(de.name, ".") == 0 || strcmp(de.name, "..") == 0)
        continue;
      memmove(p, de.name, DIRSIZ);
      p[DIRSIZ] = 0;
      if(stat(buf, &st) < 0){
        printf("find: cannot stat %s\n", buf);
        continue;
      }
      find(buf, pattern);
    }
    break;
}
|
而match函数随便写一个字符串匹配或者KMP算法即可。
给了grep.c,直接调接口
Lab1-5: xargs
xargs command命令的参数同样是shell指令,它读取stdout作为参数指令的参数。简单来说,xargs把左边指令的输出放到最右边当作输入。但在我们的实现中,还有诸多细节:
- stdout中每一行作为一个参数,也就是需要以
\n分割。然而这里xv6并没有方便的库函数读取一行输入,需要自己实现readline()
 1
 2
 3
 4
 5
 6
 7
 8
 9
10
11
12
13
14
15
16
17
18
19
|
int readline(char* buf) {
    char ch, line[MAXARG] = {0};
    int bytesRead = 0;
    while (read(0, &ch, 1)) { // Read a char from stdout
        if (ch != '\n') {
            line[bytesRead++] = ch;
            if (bytesRead + 1 >= MAXARG) {
                printf("xargs: line too long\n");
                return -1;
            }
        } else { // End of line
            if (bytesRead > 0) {
                line[bytesRead] = '\0';
                return 1;
            }
        }
    }
    return -1;
}
|
 1
 2
 3
 4
 5
 6
 7
 8
 9
10
11
12
13
14
15
16
17
18
19
20
21
22
|
int main(int argc, char *argv[]) {
  char buf[buf_size + 1] = {0};
  char *xargv[MAXARG] = {0};

  for (int i = 1; i < argc; i++) // 去掉xargs
    xargv[i - 1] = argv[i];
  while (1) {
    int read_bytes = readline(buf);
    if (read_bytes <= 0) break;
    char xbuf[buf_size + 1] = {0};
    memcpy(xbuf, buf, strlen(buf));
    xargv[argc - 1] = xbuf;
    if (fork() == 0) { // in child
      if (exec(argv[1], xargv) < 0) {
        fprintf(2, "xargs: exec fails with -1\n");
        exit(1);
      }
    } else {
      int pid;
      wait(&pid);
    }
  }
|
在当前实现里,每exec一个shell都会打印一个$,导致运行test脚本时的输出实际上是:
1
2
3
4
5
|
sh < xargstest.sh
$ $ $ $ $ $ hello
hello
hello
$ $
|
为了消除烦人的$,我们需要修改shell源码,让其判断是否从文件中打开。相关逻辑位于:
 1
 2
 3
 4
 5
 6
 7
 8
 9
10
11
12
13
14
15
16
17
18
19
20
21
22
23
24
25
26
27
28
29
30
31
32
33
34
35
|
// user/sh.c:134
int getcmd(char *buf, int nbuf){
  write(2, "$ ", 2); // 加入判断逻辑
  memset(buf, 0, nbuf);
  gets(buf, nbuf);
  if(buf[0] == 0) // EOF
    return -1;
  return 0;
}

int main(void){
  static char buf[100];
  int fd;
  // Ensure that three file descriptors are open.
  while((fd = open("console", O_RDWR)) >= 0){
    if(fd >= 3){
      close(fd);
      break;
    }
  }
  // Read and run input commands.
  while(getcmd(buf, sizeof(buf)) >= 0){
    if(buf[0] == 'c' && buf[1] == 'd' && buf[2] == ' '){
      // Chdir must be called by the parent, not the child.
      buf[strlen(buf)-1] = 0;  // chop \n
      if(chdir(buf+3) < 0)
        fprintf(2, "cannot cd %s\n", buf+3);
      continue;
    }
    if(fork1() == 0)
      runcmd(parsecmd(buf));
    wait(0);
  }
  exit(0);
}
|
只需要加入一个状态变量判断是否经过fork即可。
user/sh.c作为shell功能很受限,可以为其添加更多常用功能,如:
- 支持wait
- 支持
;
- 支持子shell:
(,)
- 支持tab自动补全
- 支持history
- ……
详情请参考《CSAPP-shellLab》,👴懒得写了。
👴唯一想写的就是给shell增加一个退出键ctrl+c或者说关机键,要不然每次得从外面关闭终端,很不优雅。
但是这个ctrl+c可不是那么好搞的。sh.c里只能处理ANSII字符,我们需要找到更底层的监听键盘事件的库,也就是键盘驱动。然后发现根本没有驱动,可能学到IO那章就会写驱动了吧。
实在不行我写个"exit"总可以吧。可以是可以,但是不管用。退出sh会无限重启。
最后👴查到可以ctrl+f,然后按a就能退出qemu了。👴青结。
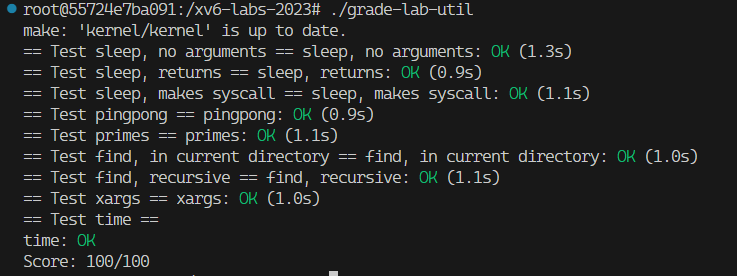
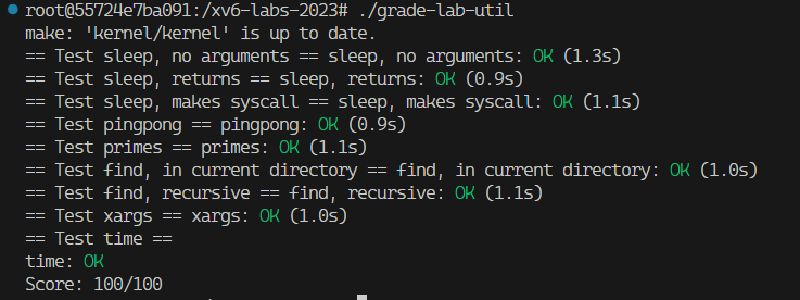
打个分⑧: